Recovering HFS PartitionsApple Partition Recovery (HFS / HFS+) Return
to Main Forensics Index page
Background: EnCase 6, as of this writing (July 2008), will recognize the EFI / GPT partition tables used with the Intel-based Mac OS X operating system. As EnCase has supported HFS / HFS+ file systems for quite a while, it will mount these file systems as defined in the EFI / GPT partition tables. Thus, in a perfect world you should need only to point EnCase to the Apple physical drive and the mounting of the Mac file system should occur. But, we don't all live in a perfect world and for a variety of reasons, this may not happen as expected and you may be faced with having to manually recover the Apple partition. There are several reasons why this may happen. Here are a few reasons:
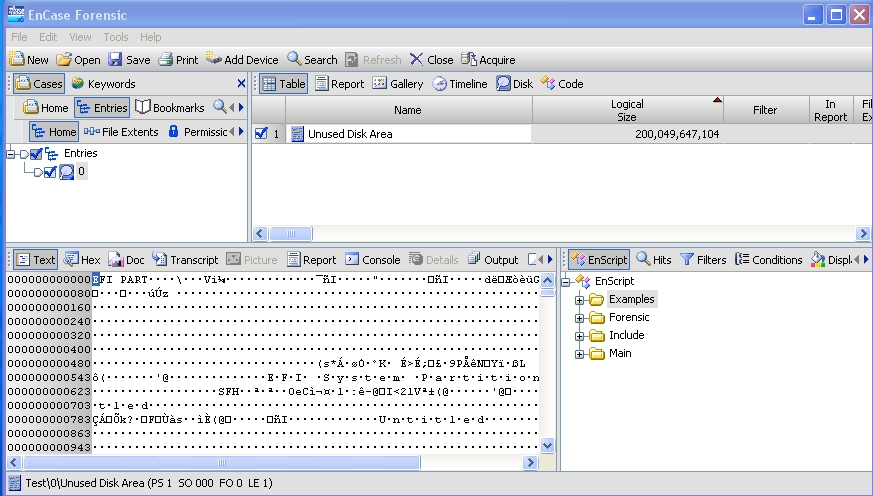
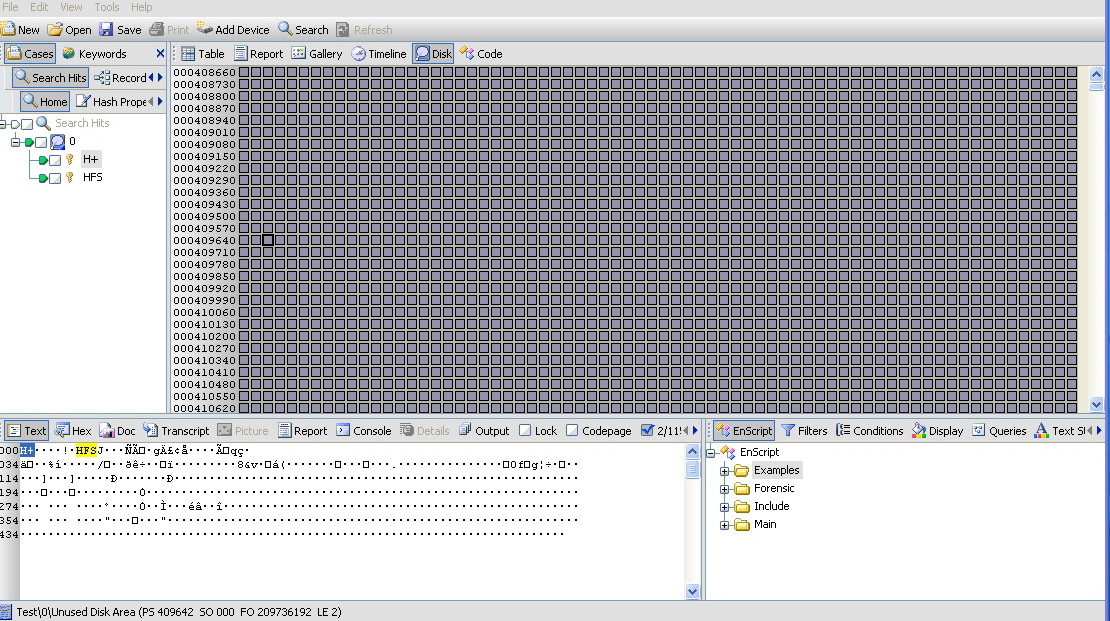
If you find yourself in a position where you have to manually recover an Apple partition, the below steps should get you through the process. Partition Recovery Steps: If you mount your Apple physical drive and EnCase returns "Unused Disk Area" in lieu of a mounted file system, first make sure your dongle is inserted and it being seen by EnCase. In other words, make sure it is NOT in acquisition mode. While this may seem as simple as saying plug in the power cord and turn on the computer, in all sincerity, this is an important first step! If you are sure that EnCase is not in acquisition mode and that your Apple drive is being reported as "Unused Disk Area", as seen below, then you are ready to start recovering the partition.
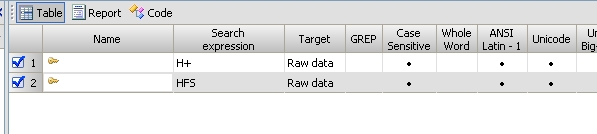
The first step is to create two keywords, which are "H+" and "HFS". Don't use the quotes and make them case sensitive as shown below.
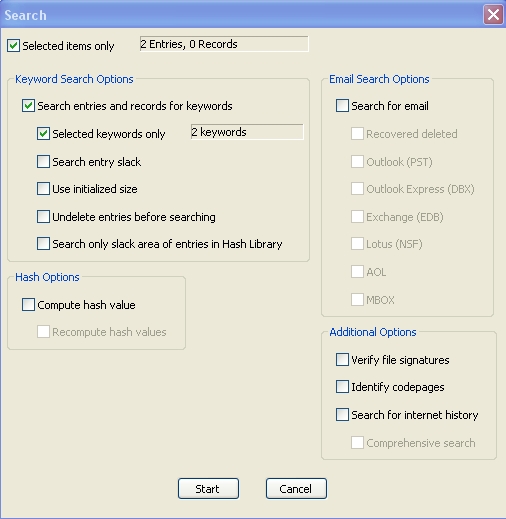
Next, start a search of the entire Apple drive for the above two search terms.
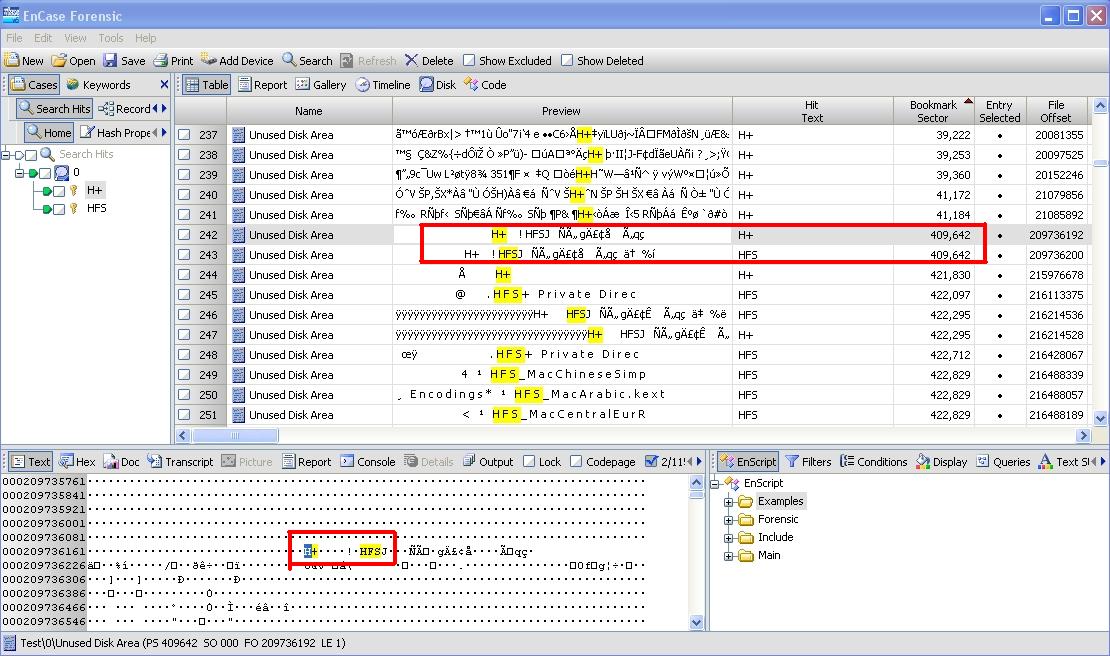
Let your search run for about a minute and then double click on the search progress bar in the lower right corner to stop the search. For a normal default installation of an Apple partition, you'll find what you need within less than a minute as the partition starts very close to the beginning of the drive. Go to your search hits view. Find your "Bookmark Sector" column and drag it over so it appears next to your "Hit Text" column as shown below. Sort by "Bookmark Sector" and use the "set included folders" button to cause both keywords to display. In other words "home plate" both keywords. When you are set up as shown below, you can view both these keywords in the order they appear on the disk (sector sort). At the first occurrence of both these keywords in the same sector, you have found what you are looking for. Note that in the below example, H+ and HFS are appearing in sector 409,642. While this is not the precise beginning point of the partition, you are very close. You are, in fact, two sectors into the partition.
Your next step is to switch the right pane to the disk view as shown below. You should note that even though you are still in the "Search Hits" tab, the disk view focus is on the sector (409,642) containing your H+ and HFS search hits, which you can see in the bottom pane of the below screen shot.
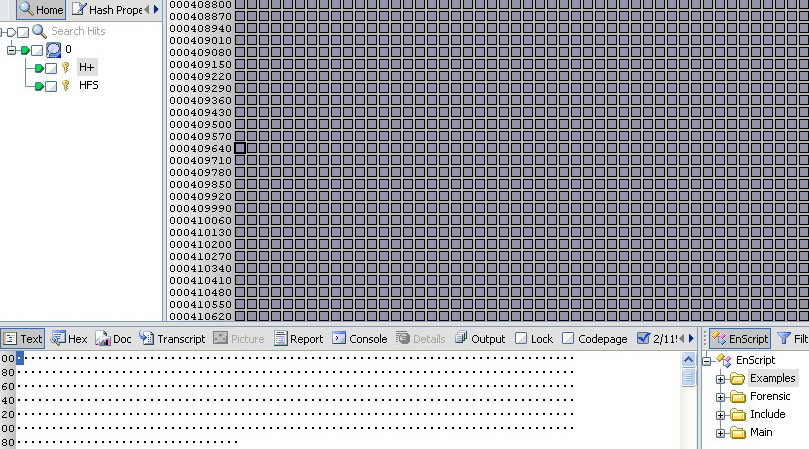
As noted earlier, this sector is two sectors into the HFS+ partition. Before we can insert or rebuild the partition, we must place our focus, in the disk view, on the sector where the partition starts. Therefore, you need to back up two sectors, as shown below, noting that you are now on sector 409,640.
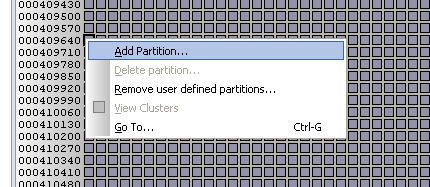
Right click on this partition and choose "Add Partition"
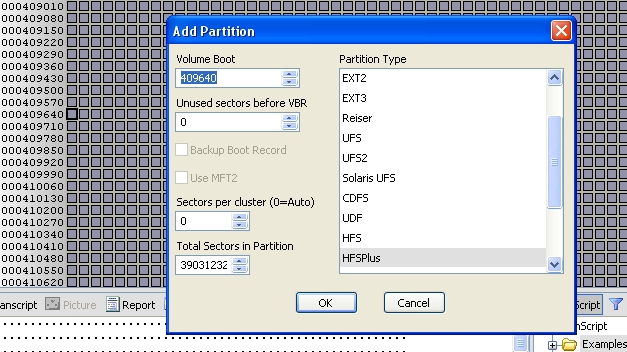
On the screen that follows, you should note that the defaults have been populated for the Apple partition that EnCase has now recognized. It is difficult to see in this screen shot, but the HFSPlus partition type is bolded. Accept these defaults and click OK.
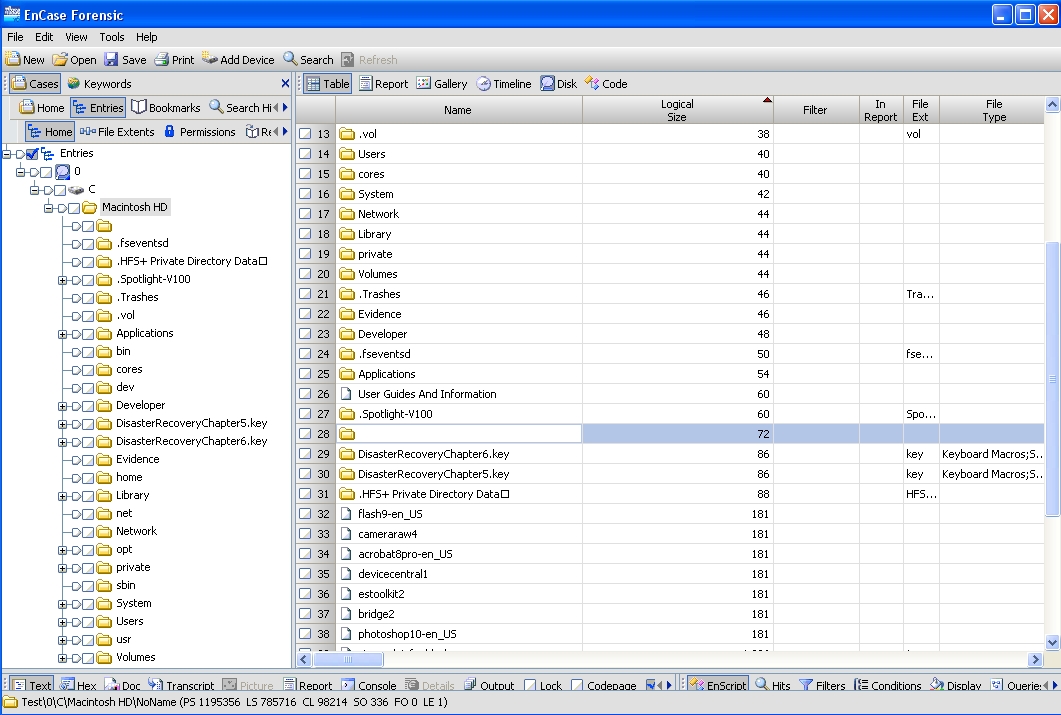
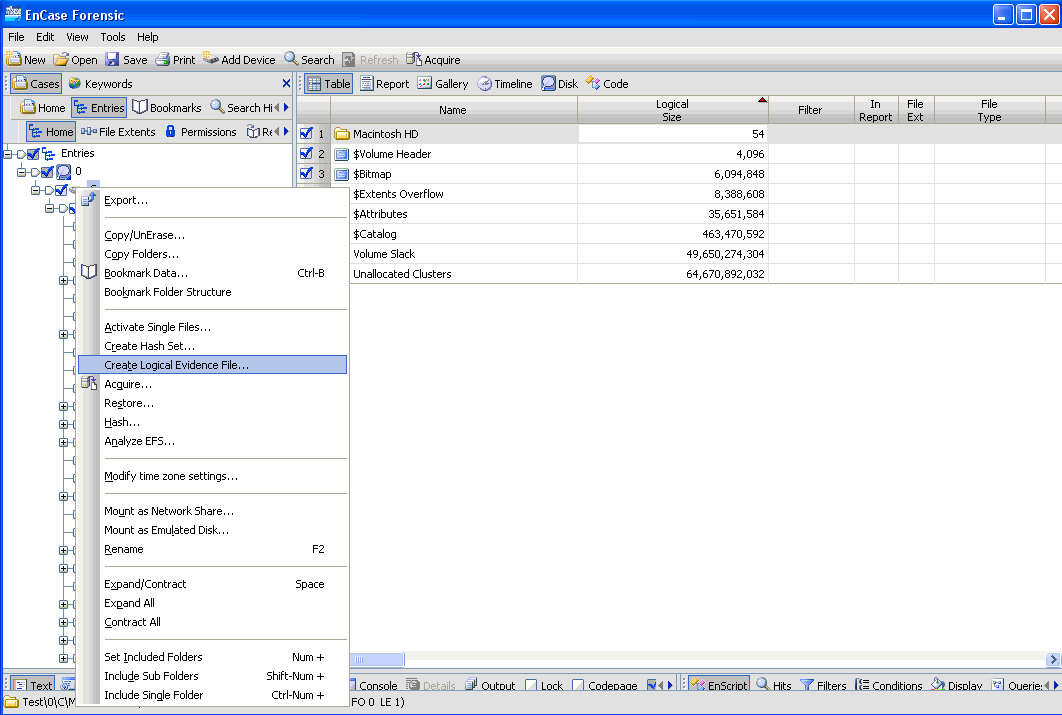
After you click OK, the partition will be rebuilt. If you return to the Entries tab, you will find the rebuilt Apple HFS+ file system. While it may seem that you are done, there is another issue to consider. If you search for data, bookmark it, and go to create a report, all data will be reported by EnCase as being found, not in the recovered file system, but still in the unused disk space. This is an issue with EnCase for any user inserted partition. The work around for this is to create a logical evidence file of your recovered partition.
To create a logical evidence file of your recovered partition, select all of your items in your new partition and right click on the root of the recovered volume, choosing "Create Logical Evidence File" as shown below.
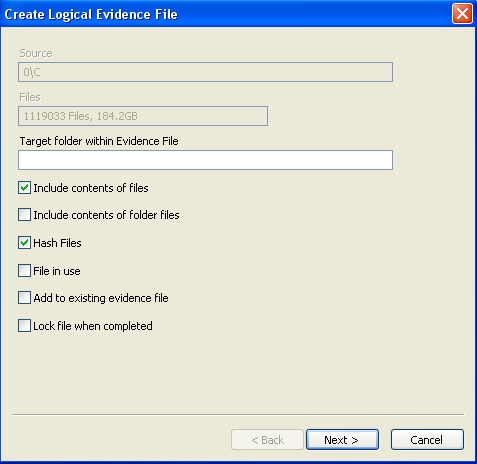
The first screen for logical evidence file properties is one where you can typically accept the defaults and move on by clicking OK.
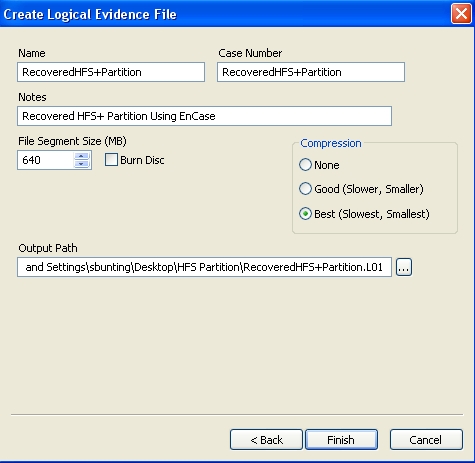
On the next screen, give your logical evidence file a name, add notes, choose your compression level, and select a destination.
When done, add your logical evidence file to your case and do your work on it.
|
|||||||||||||||||||||||||||||||||||||||||||||
|
|||||||||||||||||||||||||||||||||||||||||||||